
Hello Friends! Happy (almost) Valentines Day!
I don't know about you guys, but this year v-day snuck up on me. I started putting little bits of pink up around my house and then BOOM, it was almost here and I felt blind sighted. Suddenly I am running around getting valentines for everyone, including my mail man who hustles up packages to my porch all year long. Dan, if you are reading this you are the best for even putting up with me and no amount of mouse shaped chocolate could say thank you.
"Wait! stop! I wasn't ready!" is how I feel about this whole month, haha.
+Tiffany Davis (aka. @Tifferently) and I have been plotting something fun for you guys to try for the big day and we wanted to make it something simple that you could accomplish just in the knick of time. So Tiff brings you her best recipe for DIY Disney chocolates and I whipped up a heart shaped box that you can print at home with matching "fab 5" tags!

Tiffany brings her a-game in the kitchen and you guys are in for a treat, here was the last post we did together if you haven't read it. I think without the peppermint those marshmallows would be oh-so cute at a Valentines Day party.
On to the good stuff, here is how to make the chocolate. To get these cute shapes Tiff used a Disney Parks mold, which is available online here.
Take it away Tiffany!

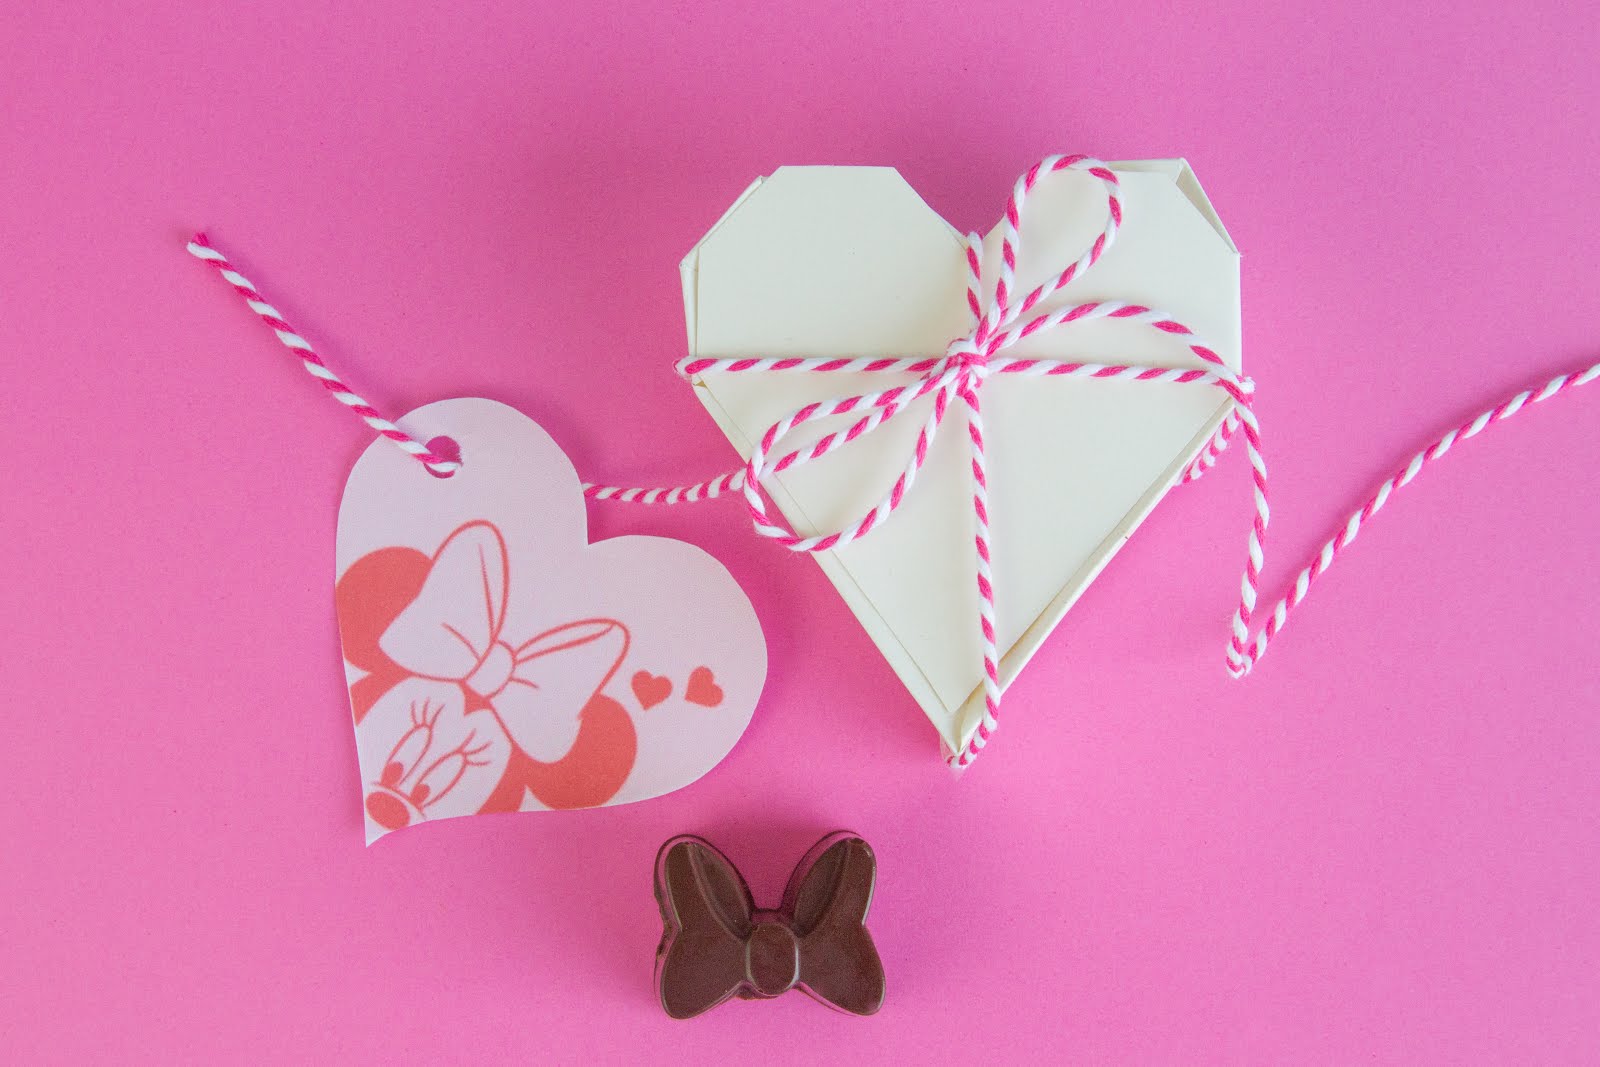
Molded chocolates are surprisingly easy to create at home. Treat your favorite Disney loving pal to some adorable DIY Disney chocolates and a sweet heart shaped box.
What You Need:
- A bar of your favorite good quality dark or milk chocolate
- Disney Silicone Mold (this is the one I used)

You will need to temper your chocolate before putting it in your molds. Don’t worry it’s not as complicated as it sounds. Tempering is just a fancy word for the process that ensures chocolate is smooth and shiny, and not dull. This process will help you on your way to making your Disney-fied chocolates.
Set up your double boiler with a small amount of water. The water should not be touching the top pan and warm it over medium-low heat. Begin by melting three-fourths of the chocolate needed. Use small chopped pieces of chocolate and stir constantly as it melts, heating it to about 120 degrees Fahrenheit. Once the chocolate is smooth, remove it from the heat and add the remaining chocolate, stirring it in until it’s melted and the temperature has dropped to about 80 degrees. To finish the temper, heat the chocolate again in the double boiler to between 88 and 91 degrees for dark chocolate, or 86 and 88 degrees for milk chocolate.
Immediately pour the chocolate after tempering to prevent the chocolate from hardening too soon. Pour the melted chocolate into the molds. For smooth chocolates, fill the molds to the rim. You may need to smooth the chocolate into small details using the tip of a toothpick.
Cool temperatures help chocolate set quickly. Place the molds in the refrigerator to help quickly cool the chocolates so they are ready in about 20 minutes. Fully cured chocolates will appear slightly cloudy upon initial removal from the fridge. The chocolate is not done curing if there are any shiny wet spots. The chocolates will also be easy to remove once they are fully cured. Remove the finished candy.


And now that you have chocolates, you need a box right?
Well long story short Tiffany and I both went to Michaels in search of the perfect boxes for these magical morsels, and both came out empty handed. Nothing seemed right and it was quite the struggle. Well, I came across card stock and thought making the box both printable and heart shaped would make it easy for you guys to try! I found this template design, and re-sized it for this post so that you can fit a few chocolates inside.
To print the template: Click here, download the pdf and print it full scale on card stock.
You can do this with plain printer paper but I think the folds work best on thick card stock. After that, all you have to do is cut it out and glue and you have yourself a sturdy heart box to put your chocolates in.

And to go with your box? Here are some printable Fab 5 (Mickey, Minnie, Pluto, Goofy, Donald) tags to go with the valentines theme. Punch a hole in the corner, and attach with some twine.

Pro Tip: you can change the size of these by choosing the scale at which they print! For big tags, print at twenty percent. For small tags, print at five to ten percent.


And just like that, you whipped up valentines for all your favorite people with time to spare ;)
You guys seem to love these posts with Tiff, if you want to see something green from her in March leave a comment down below to let me know! If you try this for Valentines Day make sure to tag us so we can share your creations!
With lots of love,
Natalie


 Valentines Day! I don't know about you guys, but this year v-day snuck up on me. I started putting li...)
0 comments:
Post a Comment