Ariel and Alder
Good morning, and happy Monday!

Todays blog post is short and simple since I am working on a really bulky post for Friday. I wanted to tell you guys a little bit more about the pink teacup patches that just arrived In the A&A Etsy Store last week. I was planning on creating something fun for Valentines Day and the pink teacup has always been one of my favorite Disneyland inspired motifs. I always make a run right for the pink heart cup when choosing a teacup to ride in on The Mad Tea Party. 

If you have no idea what I am talking about, it is this teacup in the Alice section of Fantasyland.

The design for the patches was pulled directly from my hoop design (pictured below) and I wanted the patch to look hand drawn with un-identical side hearts and a thick handle. 

Here is a closer look at how they turned out, I am obsessed!


I made a large batch of these so they wouldn't sell out too quick, and tried to make the price point super approachable. Keep in mind that these patches are seriously huge and would look so cute on any jean jacket or bag. 

The goal of the Etsy store is to create more products that inspire you guys to DIY your own Disney Style so if you have a suggestion based on a hoop design or character, just leave it in the comments below. I love when you guys suggest things, it helps me to understand what I should stock in the shop based on reader interest.

Here is a size chart so you can understand just how big these patches are. 

If you have one at home or just ordered one, here is how to iron it onto clothing and fabric. I have these instructions in the listing on Etsy, but I figured additional info is always a good idea :)

Application, Care And Use:

1) Ensure the fabric is clean and free of wrinkles.

2) Warm your iron to about 240 degrees or lower if you are working with mesh or delicates.

3)Pre-heat the location where you are going to place your patch.

4) Place a thin cloth on top of the patch.

5) Iron with moderate pressure for 5-20 seconds

6) turn the garment inside-out and iron the patch for an additional 20-30 seconds to secure.

I can't wait to see what you guys create with the patches and how you wear them! Tag me on Instagram or send me a snap if you do!


xo,
Natalie

Happy Friday!

Coming at you with a video tutorial today so I am going to keep the writing portion of this post short and sweet. March is the only time of year I wear green on my nails, so I like to pull out my only two green polishes and have some fun for the month. With green in mind for the month ahead (why oh why is February so short) and a normal dose of Disney magic, I give you some DIY Peter Pan nail art to try!


Polishes Used: Lime Green (dupe linked here)/ Emerald Green/ Red/ Glitter/ and Topcoat

You can read all about my thoughts on the topcoat I used for this tutorial in this blog post from September! I love love love it and it replaced my old favorite, the whole Formula X system is great actually. You can see me using the base coat in the beginning of the video as well. Good stuff.

Here is how to do it!

And here is me (or rather, my hand) trying it out on my left side, on the rainiest day of the year no less! Some advice with making the feather shape, use a pen or a dotting tool for a better turnout.


In the end, the goal with nail art is to have fun so use your own imagination to make some "Neverland worthy" additions. If you give it a try, make sure to share with me on Snapchat or Instagram. It will make my whole day I assure you!


Have a magical weekend!

xo, 
Natalie


Hello Friends! Happy (almost) Valentines Day!

I don't know about you guys, but this year v-day snuck up on me. I started putting little bits of pink up around my house and then BOOM, it was almost here and I felt blind sighted. Suddenly I am running around getting valentines for everyone, including my mail man who hustles up packages to my porch all year long. Dan, if you are reading this you are the best for even putting up with me and no amount of mouse shaped chocolate could say thank you.

"Wait! stop! I wasn't ready!" is how I feel about this whole month, haha. 

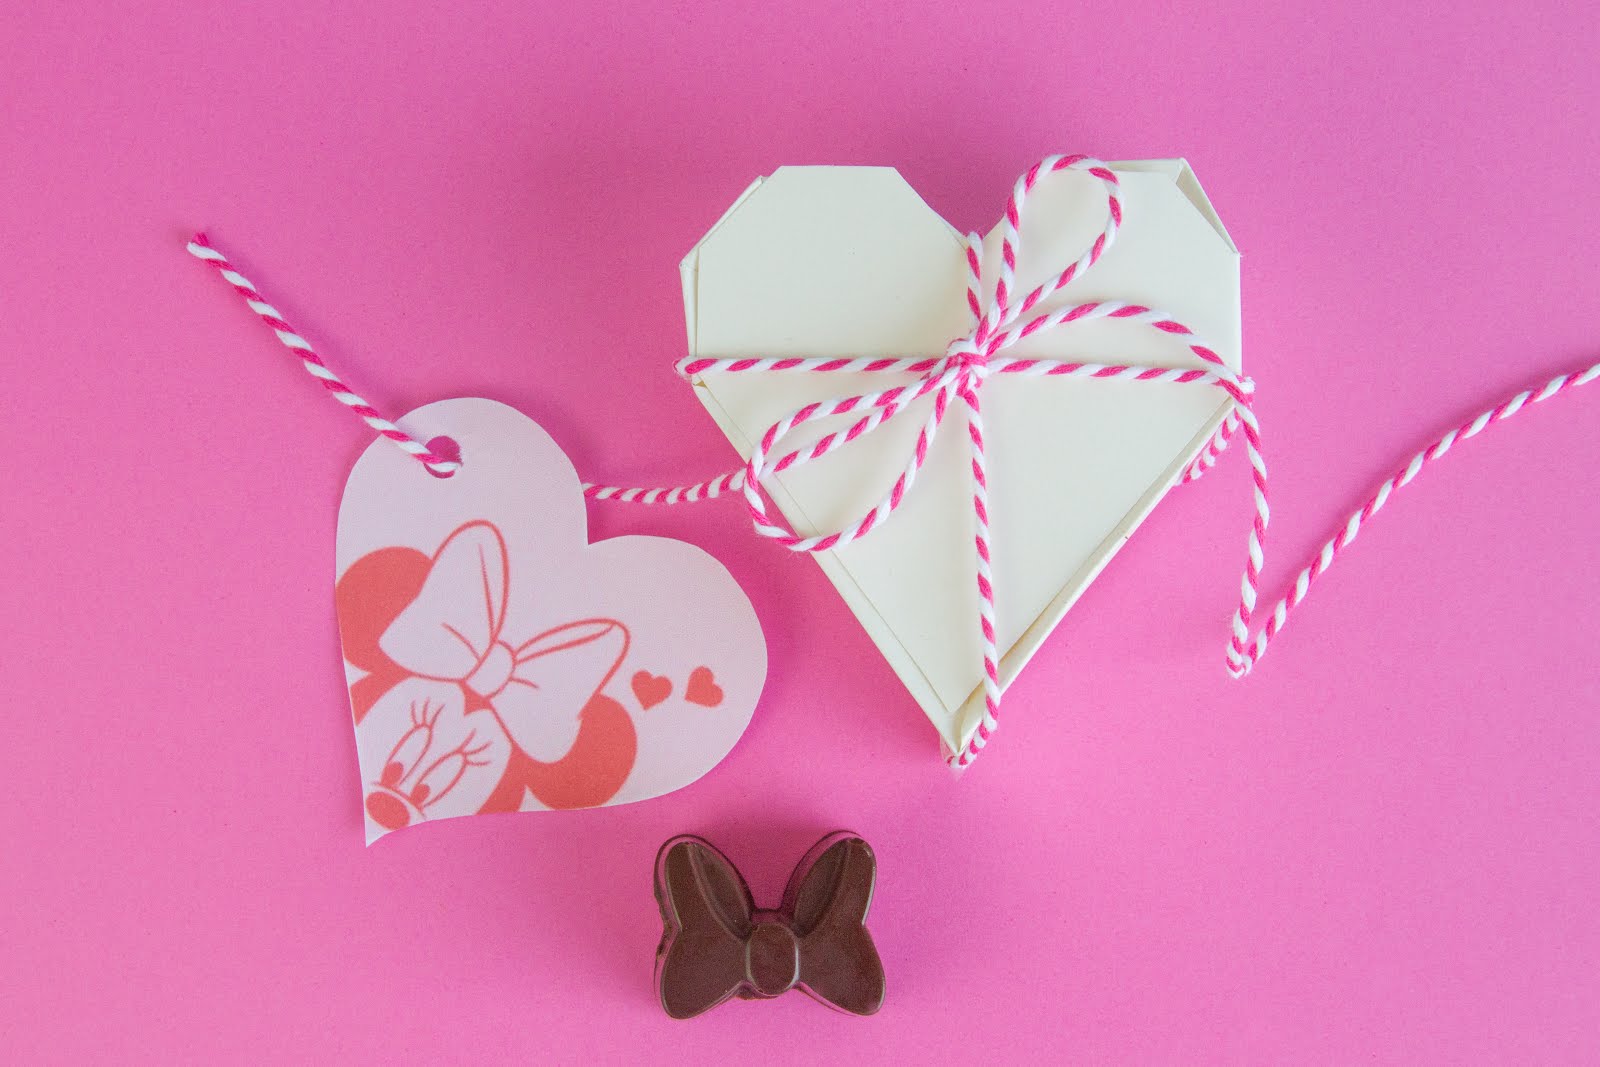
+Tiffany Davis  (aka. @Tifferently) and I have been plotting something fun for you guys to try for the big day and we wanted to make it something simple that you could accomplish just in the knick of time. So Tiff brings you her best recipe for DIY Disney chocolates and I whipped up a heart shaped box that you can print at home with matching "fab 5" tags! 

Tiffany brings her a-game in the kitchen and you guys are in for a treat, here was the last post we did together if you haven't read it. I think without the peppermint those marshmallows would be oh-so cute at a Valentines Day party. 

On to the good stuff, here is how to make the chocolate. To get these cute shapes Tiff used a Disney Parks mold, which is available online here.

Take it away Tiffany!


Molded chocolates are surprisingly easy to create at home.  Treat your favorite Disney loving pal to some adorable DIY Disney chocolates and a sweet heart shaped box.

What You Need:

- A bar of your favorite good quality dark or milk chocolate
- Disney Silicone Mold (this is the one I used)


You will need to temper your chocolate before putting it in your molds. Don’t worry it’s not as complicated as it sounds. Tempering is just a fancy word for the process that ensures chocolate is smooth and shiny, and not dull. This process will help you on your way to making your Disney-fied chocolates.

Set up your double boiler with a small amount of water. The water should not be touching the top pan and warm it over medium-low heat. Begin by melting three-fourths of the chocolate needed. Use small chopped pieces of chocolate and stir constantly as it melts, heating it to about 120 degrees Fahrenheit. Once the chocolate is smooth, remove it from the heat and add the remaining chocolate, stirring it in until it’s melted and the temperature has dropped to about 80 degrees. To finish the temper, heat the chocolate again in the double boiler to between 88 and 91 degrees for dark chocolate, or 86 and 88 degrees for milk chocolate.

Immediately pour the chocolate after tempering to prevent the chocolate from hardening too soon. Pour the melted chocolate into the molds. For smooth chocolates, fill the molds to the rim. You may need to smooth the chocolate into small details using the tip of a toothpick. 

Cool temperatures help chocolate set quickly. Place the molds in the refrigerator to help quickly cool the chocolates so they are ready in about 20 minutes. Fully cured chocolates will appear slightly cloudy upon initial removal from the fridge. The chocolate is not done curing if there are any shiny wet spots. The chocolates will also be easy to remove once they are fully cured. Remove the finished candy.


And now that you have chocolates, you need a box right? 

Well long story short Tiffany and I both went to Michaels in search of the perfect boxes for these magical morsels, and both came out empty handed. Nothing seemed right and it was quite the struggle. Well, I came across card stock and thought making the box both printable and heart shaped would make it easy for you guys to try! I found this template design, and re-sized it for this post so that you can fit a few chocolates inside.

To print the template: Click here, download the pdf and print it full scale on card stock. 

You can do this with plain printer paper but I think the folds work best on thick card stock. After that, all you have to do is cut it out and glue and you have yourself a sturdy heart box to put your chocolates in. 


And to go with your box? Here are some printable Fab 5 (Mickey, Minnie, Pluto, Goofy, Donald) tags to go with the valentines theme. Punch a hole in the corner, and attach with some twine. 


Pro Tip: you can change the size of these by choosing the scale at which they print! For big tags, print at twenty percent. For small tags, print at five to ten percent.


And just like that, you whipped up valentines for all your favorite people with time to spare ;)

You guys seem to love these posts with Tiff, if you want to see something green from her in March leave a comment down below to let me know! If you try this for Valentines Day make sure to tag us so we can share your creations!

With lots of love, 
Natalie


Happy Friday Friends!

Before we dive into my caffeine addiction, it's affect on my creativity, and an opportunity for one of you to win twenty five thousand dollars (!!!) here is something I want you to know about this post and my partnership with Folgers!

This post is sponsored by Folgers as part of an Influencer activation for Influence Central. I enjoyed testing out Folgers Coffee as a part of this campaign and only share products on Ariel and Alder that I would truly recommend. I am disclosing this in accordance with the Federal Trade Commission (FTC) guidelines concerning the use of endorsement and testimonials in advertising. I received complementary products to facilitate this review.

In short, Folgers wanted me to share something with you guys and I got to taste test some coffee for "research purposes" along the way. No arm twisting was necessary in the making of this post, hah ;)


Life revolves around coffee, and for me this statement is extra true. I wake up every day only ready to hit the day after a few sips of this glorious brewed energy, and I know I'm not alone. Eighty three percent of Americans start their day with at least one cup of this mighty dark fluid (USA Today) and with enough of us drinking it, it's not surprising that coffee has become synonymous with late nights and early mornings.  

Some of the best days start early in the morning and much as I try to keep a somewhat healthy schedule some of my best creative "Eureka!" moments arrive late at night, both of these instances are usually supplemented with a cup of coffee. Finishing a long embroidery project, writing a blog post, brainstorming for whats ahead. If inspiration had a smell, it would smell like coffee for sure.

Mug by Molly Hatch

Folgers is hosting a contest for caffeine fueled creatives, and the payoff comes in the form of a 25,000$ grand prize. Stretch your brain, put on your thinking cap, and grab a cup of coffee. Here are the contest details, and just in case I miss something here is a link to the website.

This contest is centered around the iconic Folgers jingle! 


which is a phrase I personally heard about a thousand times as a child, not even knowing what coffee was or why it might be the best part of anyones morning. In particular I remember watching this 1996 commercial, too funny how some things stay the same and get refreshed.

If you have a musical ear, here is how you enter and some dates to be aware of.


January 30th through February 27th: Submit a video of your rendition of the jingle here. Your version of the jingle should include they complete melody and complete lyrics. 

Febuary 27th to March 19th: Folgers will choose 5 semi-finalists and each will have a mentor session with country singer Chris Young before the online vote. 

March 27th to April 24th: Folgers fans around the country will vote daily for their favorites. Every vote is automatically entered to win prizes up to $10,000

May: one winner will be selected to win the grand prize of $25,000

Here is a video that goes over the contest!


Good luck, have fun, and stay caffeinated :)

xo, 
Natalie
The end of the holiday season, the election, a new school term, we are all so tired and it's still the middle of winter. I drag myself to the gym everyday because the weather is so gloomy and I won't leave my heated house without the promise of some endorphins when I return. It's a weird time of year.

Lucky for us, Valentines Day is on the horizon! Bring on the pink and red!


Polaroid Camera: I need to get my hands on one of these! Polaroid cameras are so trendy right now and when I saw this one on sale ($30.00 off!!) I thought the color was so perfect for a great price!

Wall-E Valentine: I follow the "Studio Grason" duo on Instagram and when they released this Wall-E valentine design I knew I had to include it. How cute would this card be as a valentine, Wall-E pulls right at my heart strings.

Mushu and Cricket POP Set: I have been loving all the Lunar New Year things DCA has been up to in January and it reminded me just how much I love the film Mulan. These would look so cute on a desk or just as a nice bright pop of color on a shelf.

Heart Snapshot Framed Print: Ordered one of these for Cam and I love how it turned out! Minted is the best for personalized things and this piece is such a fun mini art piece that brings some love to your home all year long. We ordered our Holiday Cards through Minted this year and we loved how they turned out, if you havent seen that post click here to read and take a peek.


I included a snap of how the one I ordered turned out, obsessed!

Mickey Mouse Watch: You might see this watch or ones like it on just about every guide I do, who doesn't need a classic Mickey Mouse watch? The fun red strap is extra perfect for Valentines/Galentines gifting.

Follow Your Heart Banner: Target does it again! You guys, this banner is just eight dollars and is supposed to be used "temporarily" at parties. I think not, this would look so cute in a dorm, office, apartment, or studio space. Take my money Target, take my money.

Cheers to a month full of bright red, bubblegum pink, and the promise of spring.

xo, 
Natalie


Next PostNewer Posts Previous PostOlder Posts Home