Ariel and Alder
Happy Monday! 

Coming at you with a DIY today and since a few of you have been asking for some pin storage ideas, this project tackles both! Woven wall hangs have been the hottest thing for home decor this year and they are easy enough to weave. I am going to start off with a simple one that is micro in size, and if you guys like it we can move on to some crazier patterns, complicated materials, and larger sizes. 

This one we are talking about today is perfect to hang by a desk or in a dorm room and can display 2-5 pins.

You can go two routes with this project, so I have divided the supply list in two according to how much you want to spend. If you want to make more than one wall hang, I highly recommend making an investment in a weaving board or loom. It makes it super easy, this is the one I use for this DIY.

What you need (10-20$):

-Empty picture frame
-Something to use as a shuttle (knitting needle, stick)
- Yarn and wool in your colors of choice, get a variety of thickness.
-Rondelle beads (optional)

What you need (30-50$):

-Weaving board (comes with pegs, shuttle, comb, needle, etc)
- Yarn and wool in your colors of choice, get a variety of thickness.
-Rondelle beads (optional)


Here is how to make them! In total this project is a multi day one, I like to find time to work on these while watching tv at night. Similar to knitting or crocheting, the speed you do these depends on how fast you go. Don't be scared, they are super easy once you get the hang of it. 

A Beautiful Mess has a great post (click here) about weaving basics that I will reference a lot in this post! Give it a read to cover anything that I missed or didn't explain fully.

1. Create your warp

If you are using a frame for this project, read this for your set up instructions. If you are using a weave board, you can set up the size of your hang by placing your pegs and then winding your yarn vertically to set up your warp. First, make a loop at the end of your warp yarn, and fasten it to the top left peg. Then wrap it down to the bottom peg and back up again. Boom! Set up is done!

2. Make the fringe

To create tassels at the end of your weaving, cut a length of yarn and fold it in half again. I suggest between 15"-20" and you can always trim when you finish. you will make one of these per peg or slot and slip the center of your folded fringe over the first warp string, under the second, and then back to the top. Pull gently at the end of each tassel until the knot tightens.

3. Weave!

Thread your needle with a few feet of yarn for your first layer of color. To do a basic weave, you will go over under-over-under and repeat until the row is done and then push down the layer you just wove with your comb or fork. It should look a little something like the picture below a few rows (10-20) in. Use your shuttle to help make things easier and cut your weaving time in half. Insert it into a row so that every other row you just have to return the needle to the other side. It is a lifesaver. You may have to not use it towards the top of the weave since it will get too tight.


4. Weave, weave, and then mix things up. 

You will want to keep going, but switch up color blocks and styles depending on personal preference. For weaving strategies and variants, check out here and here. There are a million different ways to weave and manipulate the yarn to look a certain way. Have fun with this part and make the weave your own :)

5. Weave in the ends and remove from the frame. 

The back of these will look a little messy. Weave in the ends from your layers, and then flip the weave over. I secured everything by hot gluing some of the few key spots where yarn was poking through. You can remove the weave by simply popping it off of the frame, or by leaving a few inches of warp, slicing, and then tying knots along the top. Once again this is up to personal preference and you won't be seeing much of the backside.

6. Add beads.

This step is optional but I thought these beads added some texture into the mix. Sew them or glue them on for some shine, but like I said this is completely optional.

You are done and your little weave is ready to hang! Add pins if you want and hang it up to display using a thumb tack, command hook, or nail.


I love how these turned out! If you give this a try or like the idea, let me know so I can come up with more DIY weaving projects in the future. All the tools needed for this project are linked in the widget below. 

Have a magical start to the week :)

xo, 
Natalie


In lieu of a normal Friday blog post about general travel tips or Disney merchandise, I am going to tell you about a trip that changed the direction of my life. Some back story is required, so flash back to late 2013.

I went to college at Oregon State University intending to get my bachelors in Animal Science and continue on to be a veterinarian. If you have been a long time reader, then it is obvious that my initial plan didn't really work out. Half way through my freshman year of school, I knew I was not going to pursue a veterinary education but I really didn't know what the next step was or where I was going. 

I had been blogging for a year when I got an email about a conference that was happening in New York that summer for bloggers and other female digital entrepreneurs. I didn't really consider myself an entrepreneur of any kind at that point, but I did know that I lacked career direction and needed something to figure out what I wanted to do. Somewhat broke, I used air miles to book a flight to New York in July.


There was a shift happening in media that I was blissfully unaware of at the time. Magazines were losing clout to bloggers rapidly and the beginning of the "influencer" was well under way. I didn't know it in that dorm laundry room booking that flight, but this trip and these people would change my life and give my career some direction. 

Fast forward to July of 2014, and there I am alone in port authority trying to get a cab to my hotel. In typical New York fashion it smelled like hot armpit and I couldn't get a cab to save my life. After some finagling I made it to the hotel in one piece, spent the evening darting around for air conditioning, and got some sleep for the conference the next day. 

If you want to read about the conference and the speakers, check out this post from back in July of that year. But here are some highlights from that weekend. 

Making fast friends in Central Park with Eleanor, Mandy, and Mandy's darling mom Cheryl!

Meeting up with other bloggers, PR majors, and entrepreneurs and sharing similar pitfalls, brand deals, experiences, and triumphs. One blogger friend from that weekend that turned into a best friend is Hannah, who I talked about last week! :)

Pre and Post conference Dinners, Lunches, and Brunches.

 
A weekend that was well worth the money spent getting there and made me decide that blogging and a path in entrepreneurship was the direction I needed to take upon returning to Oregon for my Sophomore year. 

So why am I telling you about this trip almost 4 years later?

Well, because Wellesley College contacted me about a similar yet different program that could change the path for you! It's not a conference, but a Leadership workshop that offers an opportunity for college aged women to develop their leadership skills and spend part of the summer with other like minded women. Sound interesting? Keep reading!

Here are the details:

 It is a Contemporary Women’s Leadership Program that offers an opportunity for rising sophomore, junior, and senior undergraduate women to supplement their business, healthcare, or other educational journey with a liberal arts perspective on women’s leadership at the #1 ranked U.S. women’s college. The program is a five-week residential program (June 26th – July 28th) that blends academic study of women’s leadership, gender and diversity in the workplace with a practical implementation approach. Students will learn from accomplished Wellesley College Faculty and practitioners in the field, including notable alumnae. For even more info, here is a link to the website.

If this sounds like something you might be interested in, do it! Book the flight! You never know where it might lead. You can apply here.

xo,
Natalie

This post was sponsored by Wellesley College and Her Campus Media. All opinions and shared experiences are my own. Thank you for supporting the partnerships that make Ariel and Alder a possibility.

Good Morning and Happy Monday!!

After a long long long weekend of house hunting in Portland, I am so glad to be back to writing about fun Disney things instead of looking at listings. This was probably the first Monday in a long time that I was actually looking forward to catching up on work and packing upon returning home. If you aren't aware of what I'm talking about or referencing, the Portland housing market is totally insane right now.  Anyway, on to happier things! 


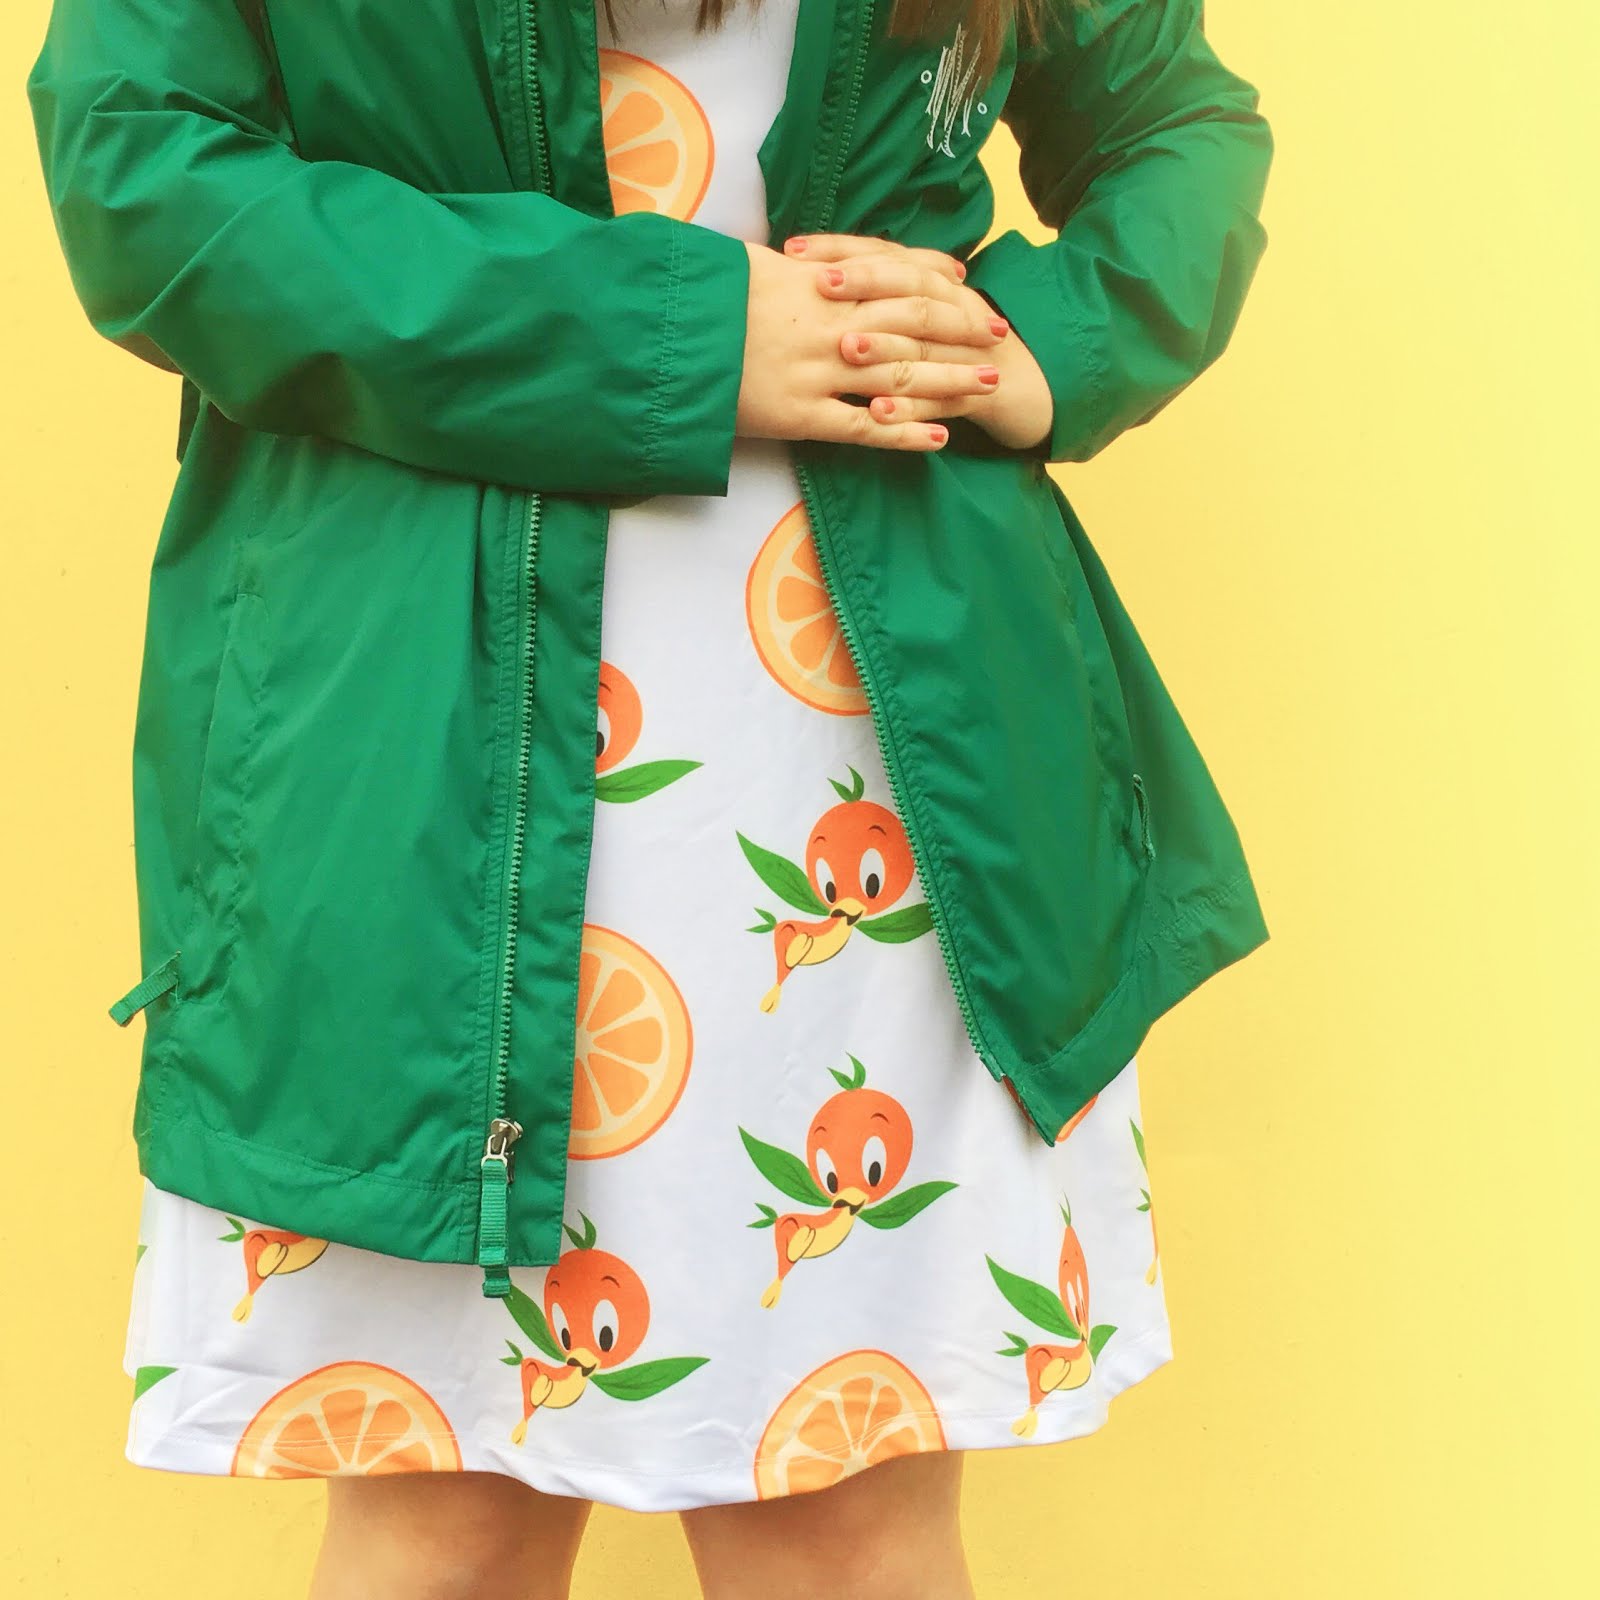
It's no secret that I am a huge Orange Bird fan, and I love anything that I can wear into the parks or showcase in my home to show off my favorite citrus bird. Last September, Jennifer (The Brave Little Tailor) sent me a dress that knocked my socks off! It has the cutest citrus pattern and feels like wearing one big legging in the best way! The fabric slips right on and flares and the bottom, perfect for Florida humidity. 

And now you are thinking, "Natalie, if she sent this dress to you last summer why are we just now hearing about it." Well it was perfect in Florida, but the one day I wore it I forgot our camera equipment in the room (magic bands make it so easy to forget everything) and then I flew home....and it got way too cold way too fast. All of this makes me the worst at keeping you in the loop, I know. I am still trying to find a cute way to style it for winter, so if anyone finds a fabulous chunky emerald sweater please let me know. Last week grabbed my camera and I wore it with some of my favorite rain gear and braved the unpredictable spring weather so that you guys could order one just in time for your summer adventures. She has every character ever included in her shop, so you most definitely don't need to be an Orange Bird fan to enjoy one. Like I said the fit is pretty incredible and the dress is super lightweight.

Including Jennifers fabulous dress, below are some Orange Bird things you need in your life!

xo,
Natalie


Happy Friday!

For todays post I wanted to share a small guide to finding some Vegan treats at Disneyland! Some of you have asked for this, and I have observed others talking about how hard it can be to stay plant based at Disney. Here are a few snacks and meals to try on your next trip if you follow a plant based diet. A few of these you might have even already tried because they aren't explicitly labeled as Vegan. Either way, they are delicious!


I want to put a disclaimer in this post that I do not follow a Vegan diet. I am just somewhat aware of the plant based choices that are available in the park and choose them over dairy and meat options from time to time. I am hoping this post will be helpful for those of you that are Vegan or try to stay well balanced when eating inside the Disneyland gates, and this is only a sampling of things you can get that are Vegan or Vegetarian in the park. There are far more offerings than I can list, so click here for a full array of offerings.


Starbucks: I know what you are thinking, "duh of course Starbucks can be Vegan!" But guys this one is really really handy. I often talk here on the blog about how I love my in park caffeine boosts and the fact that you can get your drink with alternative milks is huge in terms of Disneyland history. Coconut, Almond, Soy! They can whip up anything for you at the Starbucks locations at Disneyland.

Although with that said avoid the baked goods and sandwiches obviously.

Rancho Del Zocalo: One of my favorite (and least expensive) places to get a quick meal in Disneyland is Rancho Del Zocalo, the Mexican restaurant right outside of Big Thunder. Anything on the menu except the enchiladas can be made Vegan or Vegetarian and cast members will be happy to assist you with your specific needs.


Mickey Pretzels: YES! The Mickey pretzels are vegan! Below are the ingredients and they are the perfect non-messy snack to split in line for a ride. Cameron and I split them in the pirates line quite often and I swear it makes it go by a little bit faster ;)

Pretzel Ingredients: Water, Yeast, Flour, Sugar, Salt, Vegetable Oil, Baking Soda, Kosher Salt.

Dole Whip and Dole Whip Float: You guys this one blew my mind about a week ago. Dole whips taste super creamy so I always assumed they had dairy milk in them. Well they don't and they are one of the more "famous" Disneyland treats so be sure to give one a try on your next visit.


Boysen Apple Freeze: The whipped topping on top of this fruit derived treat is non-dairy and during the fall you can get a very fun poison apple mug to take home. This is available at Maurice's Treats in Fantasy Faire.

Jolly Holiday Salad (Modified): The jolly holiday salad is my favorite favorite (!!) thing to eat at Disneyland and there is an easy way to make it plant based. Just ask for no cheese! The cranberry, raspberry dressing, and walnuts really make the salad what it is so don't feel like you are missing out on anything. I love this salad and recommend it to literally everyone I know.

I hope this helps some of you find some easy Vegan options at Disneyland, and maybe even inspires a switch to one of these just to try something new on your next visit. 

xo,
Natalie
Hello! Happy April!

I hope you guys like reading editors notes as much as I like writing them! I so look forward to rounding up my favorite things each month and sharing them here. It serves as a trend diary of sorts some months and other months it's just a jumble of random things but I love making them.

April is a favorite month for personal reasons (it's my birthday month!) but also because it means spring is here and so is Easter. Bring on all the pastels and bunny shaped things.


Mini Purple Backpack: I love my big fat North Face backpack but I need something lighter and smaller for the parks this summer. I have had my eye on this brand for awhile and I love the size and color of this one.

Sushi Phone Case: I featured this case in a gift guide this holiday season and have been thinking about it ever since. It might be time to snag it, it is just so cute!

Easter Egg Wreath: I love Easter! Mostly because I find bunnies very cute and pastels wildly fun. This wreath is just darling, and is a super inexpensive way to spruce up your house for spring.

Teacup Patch: I know, shameless self-promo (these patches are carried in my Etsy shop) but I thought this was the perfect month to include them in! My birthday is this month and they truly are one of my favorite things. I have been loving seeing you guys sew them on jackets and attach them to backpacks, it brings me work week joy. 

Kendra Scott Nail Color: I have been wanting to test out Kendra Scott nail color for awhile and I treated myself to a bottle for my birthday month. It goes on really well and really does look "Druzy" like the jewelry. 

Brake For Cake Jumbo Patch: I threw in this darling patch mostly because it's my birthday month but also because Studio DIY recently added flair to their shop and I love everything!

April showers bring May flowers! As per usual everything mentioned is linked in the widget below.

xo,
Natalie


Next PostNewer Posts Previous PostOlder Posts Home