Happy Monday!
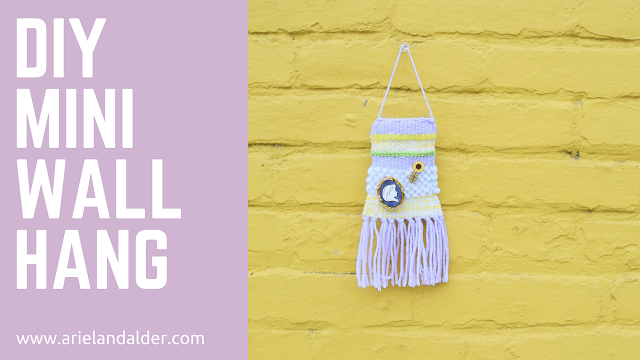
Coming at you with a DIY today and since a few of you have been asking for some pin storage ideas, this project tackles both! Woven wall hangs have been the hottest thing for home decor this year and they are easy enough to weave. I am going to start off with a simple one that is micro in size, and if you guys like it we can move on to some crazier patterns, complicated materials, and larger sizes.
This one we are talking about today is perfect to hang by a desk or in a dorm room and can display 2-5 pins.
You can go two routes with this project, so I have divided the supply list in two according to how much you want to spend. If you want to make more than one wall hang, I highly recommend making an investment in a weaving board or loom. It makes it super easy, this is the one I use for this DIY.
What you need (10-20$):
-Empty picture frame
-Something to use as a shuttle (knitting needle, stick)
- Yarn and wool in your colors of choice, get a variety of thickness.
-Rondelle beads (optional)
What you need (30-50$):
- Yarn and wool in your colors of choice, get a variety of thickness.
-Rondelle beads (optional)
Here is how to make them! In total this project is a multi day one, I like to find time to work on these while watching tv at night. Similar to knitting or crocheting, the speed you do these depends on how fast you go. Don't be scared, they are super easy once you get the hang of it.
A Beautiful Mess has a great post (click here) about weaving basics that I will reference a lot in this post! Give it a read to cover anything that I missed or didn't explain fully.
1. Create your warp
If you are using a frame for this project, read this for your set up instructions. If you are using a weave board, you can set up the size of your hang by placing your pegs and then winding your yarn vertically to set up your warp. First, make a loop at the end of your warp yarn, and fasten it to the top left peg. Then wrap it down to the bottom peg and back up again. Boom! Set up is done!
2. Make the fringe
To create tassels at the end of your weaving, cut a length of yarn and fold it in half again. I suggest between 15"-20" and you can always trim when you finish. you will make one of these per peg or slot and slip the center of your folded fringe over the first warp string, under the second, and then back to the top. Pull gently at the end of each tassel until the knot tightens.
3. Weave!
Thread your needle with a few feet of yarn for your first layer of color. To do a basic weave, you will go over under-over-under and repeat until the row is done and then push down the layer you just wove with your comb or fork. It should look a little something like the picture below a few rows (10-20) in. Use your shuttle to help make things easier and cut your weaving time in half. Insert it into a row so that every other row you just have to return the needle to the other side. It is a lifesaver. You may have to not use it towards the top of the weave since it will get too tight.
4. Weave, weave, and then mix things up.
You will want to keep going, but switch up color blocks and styles depending on personal preference. For weaving strategies and variants, check out here and here. There are a million different ways to weave and manipulate the yarn to look a certain way. Have fun with this part and make the weave your own :)
5. Weave in the ends and remove from the frame.
The back of these will look a little messy. Weave in the ends from your layers, and then flip the weave over. I secured everything by hot gluing some of the few key spots where yarn was poking through. You can remove the weave by simply popping it off of the frame, or by leaving a few inches of warp, slicing, and then tying knots along the top. Once again this is up to personal preference and you won't be seeing much of the backside.
6. Add beads.
This step is optional but I thought these beads added some texture into the mix. Sew them or glue them on for some shine, but like I said this is completely optional.
You are done and your little weave is ready to hang! Add pins if you want and hang it up to display using a thumb tack, command hook, or nail.
I love how these turned out! If you give this a try or like the idea, let me know so I can come up with more DIY weaving projects in the future. All the tools needed for this project are linked in the widget below.
Have a magical start to the week :)
xo,
Natalie


0 comments:
Post a Comment